telling stories about pictures
TalkOver is an experimental web app that makes it easy to record stories about pictures. It can be used for gathering oral history about old photographs or documents, or for any application where you want to produce narrative about images. The user talks about a picture and touches or mouse clicks on the image as they talk. The audio and marks are recorded and can be replayed, creating a rich playback, but also associating areas of the image with points in the story.
This demo arose originally from work with the community of Troedrhiwfuwch in the Rumney Valley of South Wales. The community have a vast archive of photographs and documents, mostly also stored digitally, which is awesome in itself. However, as soon as you open any one of the photos, people will tell you stories: some about past relatives that they were told as children, some from research they have done in other archives or war records The details that make the photographs come to life and connect them together are in the heads and memories of the community, but not recorded in their digital archive.
Storytelling over pictures and images is common in community heritage, but also in other areas such as describing data or evaluating screen designs.
Note: TalkOver is experimental – usable, but not a full product. It has been tested on a number of browsers and platforms. On Firefox, the maximum recording length seems to be about 90 seconds before there are problems with replay and download, but other browsers allow far longer recordings. On iOS I’ve occasionally found that JavaScript is not enabled. Please let me know if you find problems and if you are using it on projects.
Record your first TalkOver
- Go to the TalkOver app at https://datatodata.org/talkover/demo/v002/. This is a web-only app and can be used without any registration process.
- Click the “New Recording” tab.
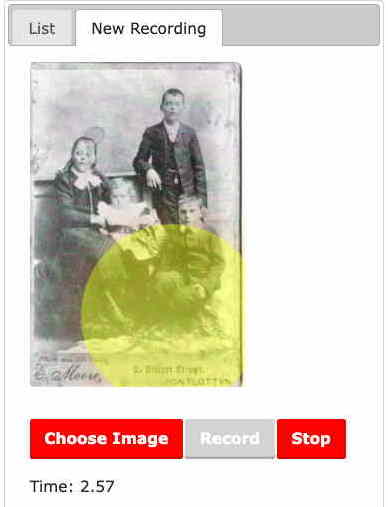
- You will see a sample picture and three buttons: ‘Choose Image’, ‘Record’ and ‘Stop’. The ‘Stop’ button will be inactive (grey) until you start a recording.
- You can change the image to one of your own, but for now just use the sample image.
- Press ‘Record’ – you may be prompted to allow the application to use your microphone
- Start to talk, pressing/clicking the parts of the image you are referring to. As you touch/click a point on the image you’ll see a small halo marker appear for a few seconds.
- When you are finished press ‘Stop’.
- A playback will appear under the ‘New Recordings’ heading on the page.
- Start the playback and hear your words replayed with the marks you made displayed at the right moments.
Using TalkOver … no installation required!
This is a web-only app and can be used without any registration. All your recordings are stored in your browser, nothing is uploaded or stored outside your own device unless you explicitly save and share it.
There are two main screens, the ‘New Recording’ tab, where you record your own Talkover stories and the ‘List’ tab, where you can manage your recordings.
New Recording Tab
You have used this already to create your first recording!
From here you can choose your own image and then make a recording in just the same way as described for your first recording. Don’t forget to click the parts of the image you are talking about.
Note that the recordings you make are stored locally in the browser of your device. There may be size limitations, both for individual recordings and for the total size of all recordings. Tests using ten-minute recordings on Chrome on macOS have worked fine, but it is worth checking your own device before using this for any fieldwork … remembering that this is still experimental!
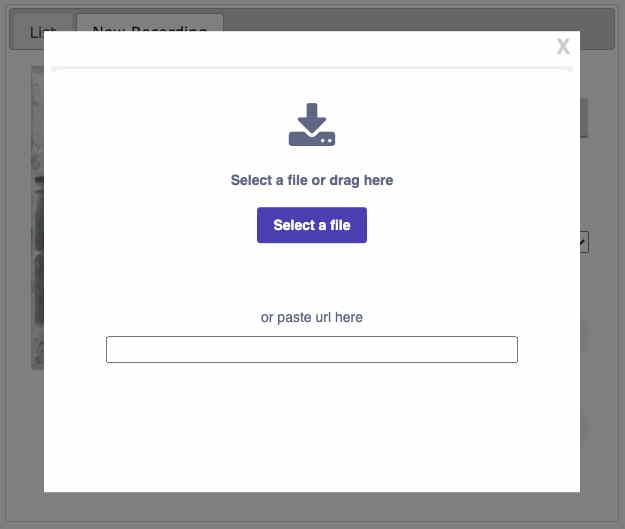
Choose Image
You can make a TalkOver recording about any picture.
In the ‘New Recording’ tab, click the ‘Choose Image’ button below the photo. This will open a file chooser popup.
You have three options:
- Drag an image from your desktop or open folder window into the active area.
- Click ‘Select a file’ and then use the system file browser to select a file from your device file chooser.
- Type/copy a url of an image from the web.
Use the required method and then click ‘Confirm’ when you see the image preview.
Note that the exact behaviour of some of these steps will depend on the browser and device you are using. For example, you may not be able to use the drag method on mobile devices.
Note too that uploading large images may have a short delay.
When you return to the New Recording tab your selected image will be visible.
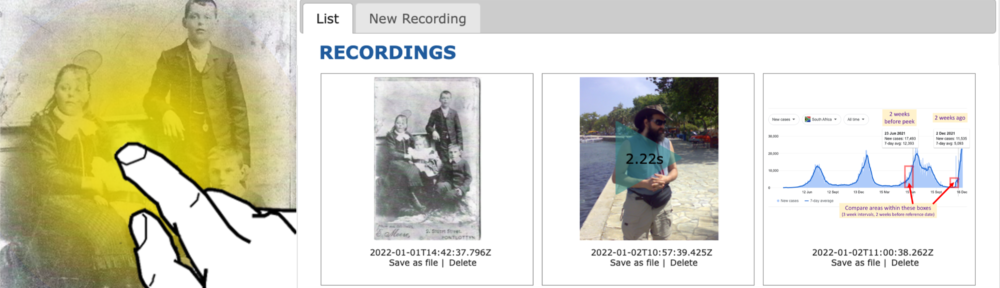
List Tab
This shows you all your past TalkOver recordings. As you make new recordings they are added to the end of the list. Each item has a thumbnail of the image.
Click the image to open a playback area for the recording.
Below each item in the list there are two action links ‘Save as file‘ and ‘Delete’.
The ‘Delete’ action allows you to remove unwanted recordings, but do note that unless you have previously kept a backup using ‘Save as file‘, deleting is irreversible!
Saving and sharing
Below each TalkOver item in the list view there is a ‘Save as file’ link. Press this to create a copy of the TalkOver recording that can be saved on your own file system, to keep or share with others.
When you first create a TalkOver the data is on your own device only. Saving as a file allows you to copy the item from the application-private space of the browser onto your device’s memory so that you can backup or share TalkOver recordings. Later versions may allow cloud sharing within the application, but currently this is the only way to backup and share.
When you click ‘Save as file’ a small progress banner will appear for a short time. After this the saving has commenced, but the feedback you get for this depends on the browser. So please be patient.
Audio recordings are smaller than videos, but can still be large, for example a 5 minute recording uses about 70Mb of memory. This is likely to be insignificant in your overall disk space, but means that there can be delays while saving, replaying and importing TalkOver recordings.
The saved file will have a name based on the time of the recording and an ‘.html’ extension. It is a bundled HTML file that includes the image and audio as well as the record of marks that you made and a small bootstrap player.
The file can be opened in a browser to be played standalone (just double click in most devices), although do note that longer recordings (a few minutes or more) may not open in all browsers. In that case, they may need to be explicitly imported into TalkOver.
The files are typically too large to email, but can be shared using cloud services such as Dropbox links, OneDrive, Google Drive or WeTransfer.
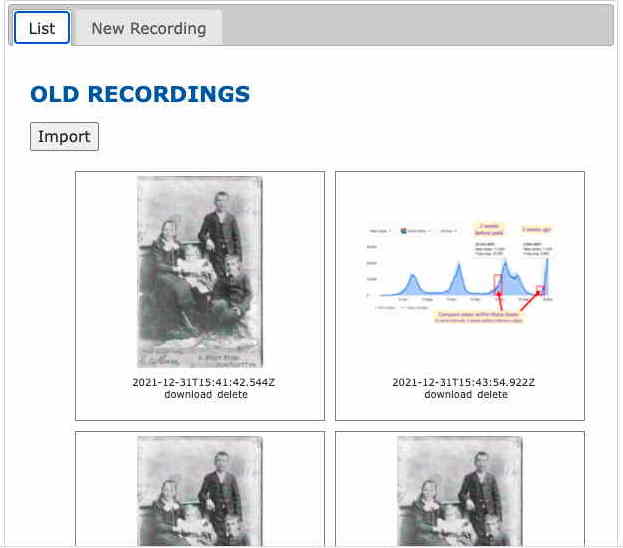
Importing Recordings
The List tab also has a button labeled ‘Import’. Click this access TalkOver recordings from others or to restore from backups. You will see a file chooser interface rather like the ‘Choose Image‘ process.
As the files are large, there can be short delays during this process, so again be patient 🙂
Once the file has been processed, a familiar playback interface allows you to replay the imported recording. When you return to the List tab, you will find the imported recording amongst your previous recordings.
Note that if you re-import a TalkOver recording that is already in your list, the TalkOver application notices it is the same and does not replicate it or duplicate storage space for the audio.
Image in screenshots from the Troedrhiwfuwch archive.